

Monday, December 23, 2013
KEYBOARD ART
Thursday, December 19, 2013
OMBRE EMBROIDERY THREAD FEATHERS

Wednesday, December 11, 2013
WHAT WE'RE LISTENING TO AND SO SHOULD YOU!
My Number by Foals
It's true! You really don't have my number!
Sunday, December 8, 2013
DIY CHRISTMAS GIFT ROUNDUP
Here is a quick roundup of some DIY christmas gifts made by A Diamond Mind for you to make this winter that are all under $15! Click pictures for links and enjoy!

DIY vanilla chai tea

For the dog lover in your life, some sweet potato chews! The only ingredient is sweet potato.

Make one of these cuties in an hour with hand sewing. Use fabric scraps to add some personality to the ears!

Order a cheap wood case and use a wood burning tool to customize it!
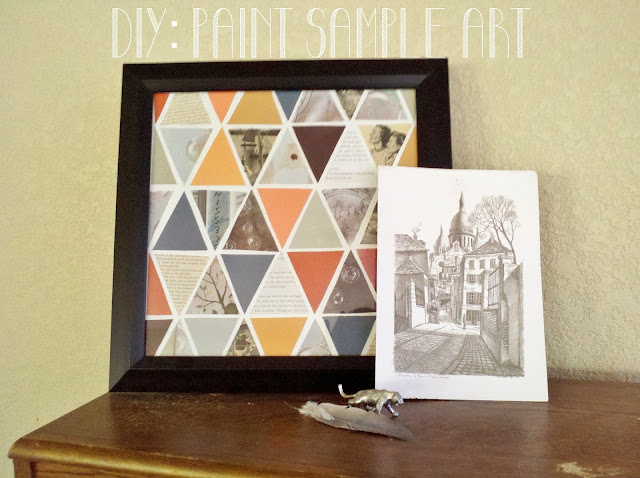
Make some geometric art with paint samples and old magazines.

This is perfect for friends or family who have moved away. Complete with homemade woodstain.
Monday, November 25, 2013
PERFUME RECIPE

Lately I have been so into making perfumes and wanted to share a recipe every once in a while! My problem is that I don't keep track of how many drops, I just go crazy until it smells right. However, here is one that I did record recently. This would be an awesome customized homemade Christmas gift! After adding the oils, I dilute with pure ethanol (you can also use vodka!), the amount depending on if I want it to be a lighter or heavier scent, but your perfume should be mostly alcohol (~90-80%). I get most all my essential oils from Bulk Apothecary, their oils are really high quality yet so cheap! I should be getting reimbursed for this damn infomercial!
UPLIFTING SCENT
9 drops Green Tea fragrance oil
3 drops Pink Grapefruit essential oil
1 drop Bergamot essential oil
1 drop Lavender essential oil
-Jerica-
Thursday, November 21, 2013

Thursday, October 10, 2013
Monday, October 7, 2013
DIY CANVAS ART


Amy painted the diamond and our friend Alix painted on the antlers. Until we can afford actual art this will have to do!
For some more DIY art ideas check out some of our other projects like paint by number updo, geometric paint sample art, nail and string art, or vintage book picture display!
-Jerica-
Saturday, September 28, 2013
5 FALL CRAFTS & RECIPES
Use some of our past DIYS to get in the moooood for looove (fall)! Click captions for links!


-Jerica-
Thursday, September 19, 2013
ENGAGED!

Guys I got engaged! Actually since my last post, I graduated and got a job doing research! So crafts have been put on the backburner :(. But this engagement party was an excuse for Amy and our friend Alix and I to get crafty! We kind of just all brought things and brought ideas and it came together so amazingly, better than I ever could have imagined! We did not have any particular theme in mind, other than we wanted diamonds. Here are some pictures of the details.
Wednesday, June 12, 2013
JASMINE RICE SIDE DISH

I found some jasmine rice on sale and was looking up some recipes and used this one because I already had anything! The bay leaf adds an amazing cool flavor to this dish.
INGREDIENTS
2 tablespoons chopped onion
1/4th cup green peas
1 bay leaf
1 1/2 cups dry jasmine rice
3 cups water
salt to taste
DIRECTIONS
- Pour 3 cups water into the saucepan and add the salt. Increase the heat to medium and let the rice come to a quick simmer. Reduce heat to low and let rice simmer lightly and sit uncovered until all of the liquid is absorbed. Cover the rice and remove from heat.
- In a large saucepan over a medium-low heat, warm the oil. Add onion and saute for 3 to 5 minutes. Mix in green peas, bay leaf, and jasmine rice. Stir to coat the rice.
Sunday, June 2, 2013
PASTA CARBONARA

Saturday, May 18, 2013
Wednesday, May 15, 2013
SHELF UPCYCLE WITH MAPS

I love this upcycle so much! I snagged these shelves at a dumpster outside of the dorms at my university. People are unbelievable when it comes to throwing things out! Many of them live out of state and have to fly or drive home so they have no choice but to throw out lots of stuff. My sister once found a down comforter and an Ipod dock in the dumpster at her school!
So anyways I grabbed these and wanted to wait to figure out what to do with them. Since school has ended I've also been trying to clean out my closet and came across a bunch of old maps! So I came up with this idea for these shelves and it fits my bathroom perfectly! Check out another DIY project that amy did with maps!
Here is the before and an after!


SUPPLIES:

Mod Podge, Maps, Exacto-Knife
DIRECTIONS:
1. Peel off any paper existing on the shelves, where you are going to lay the maps. If you want to paint the shelves any other color, do that now as well.
2. Figure out what area of the map you want to use. Cut the map into a smaller section so it is easier to manage, but not as small as your shelf size.
3. Put your map into the shelf and press into the corners to make creases. Run your exacto knife along the edges.
4. Put a very thin layer of Mod Podge on the shelf, then put your map section on. Use a heavy object to try to get any bubbles out. Let dry.
5. Put another layer of Mod Podge over the top of the map to seal it up!
-Jerica-
Monday, May 13, 2013
DIY WELCOME MAT

Here's a quick and easy one! And now you wont have to greet and say goodbye to people because your rug will do it for you. I've been meaning to make one of these for a long time and was always looking for a plain outdoor rug to do it on, but everywhere I looked they only had rubber ones or ones that had writing on them already. So I decided to just do it on the rug I've had outside for a couple years. Its going to get dirty anyways so I tried it out!
-Jerica-
Wednesday, April 24, 2013
BAKED BROWN SUGAR STEAK FRIES
For some reason, it seems like I usually stick to making the unhealthy stuff while Amy does the healthy stuff and I plan to continue that streak.
Anyway, these are sooooo delicious. It tastes almost tangy for some reason with the brown sugar/salt combo!

BAKED BROWN SUGAR FRIES
INGREDIENTS:
Baking potato (one or two)
Olive oil
Brown sugar
Salt & Pepper
DIRECTIONS:
1. Cut up potato into steak fry strips. Try to keep them uniform in size. Heat oven to 475 degrees F.
2. Place the fries in a bowl of warm water for about ten minutes. This will help soften up the inside.
2. Cover a baking pan in aluminum foil then spread about 3 tablespoons of olive oil on the pan. Sprinkle salt and pepper on the fries.
3. Place the fries on the pan and cover with aluminum foil. Place in oven for 5 minutes, remove aluminum foil covering and place back in oven for about 10 minutes. Remove fries and sprinkle brown sugar evenly on them. Rotate the pan and bake another 10 minutes. YUM
Recipe from A Beautiful Mess
-Jerica-
Thursday, April 4, 2013
Wednesday, April 3, 2013
DIY: SHOWER CURTAIN

Here's a little project I did this past weekend because I just needed to make somethingggg.
I needed a new shower curtain for my upstairs bathroom and decided to make one! I got a white sheet from the thrift store that already had the top end sewed, so it pretty much already looked like a shower curtain. To get the holes right I just laid my old shower curtain on top and made marks for the points to cut holes. And of course you still need to use a plastic liner with this.
Then I got to drawing! You can also used colored crayon with this.

SUPPLIES:
Sheet
Crayons
RIT fabric dye (found at wal-mart or anywhere really!)
DIRECTIONS:
1. Draw on sheet with your crayons. Try to keep your crayon sharp in order to show up crisper. Use your old shower curtain for measurements on the size.
2. Cut holes for the shower hooks.
3. Dye! I chose a black dye because I wanted a charcoal color. I used a huge metal pot and a metal spoon to dye it, and just kinda kept adding dye until it looked right!
4. Rinse out with water until water runs clear. Let Dry. Now take a shower, ya turkey!
-Jerica-
Sunday, February 17, 2013
DIY SWEET POTATO DOG TREATS


This homemade dog treat requires two things, sweet potato and an oven! You'll want to cut the sweet potato into slices around a quarter-inch thick; if they are too thin they will be more crispy and less of a chew, if it is too thick the heat of the oven wont be able to penetrate very deep. So a quarter inch turned out perfect for me. I even eat them myself sometimes. Amy and I are both obsessed with our dogs and will try to do some more dog-oriented recipes. No Cats Allowed here EVER. If you like this and want another homemade dog treat recipe, check out these peanut butter treats Amy made!
DIRECTIONS
 Place all your slices on a baking sheet and set your oven as low as it will go. Mine went to 200 F. By keeping it as low as possible you do more of a dehydration instead of an actual bake. I checked mine out and flipped them all over about halfway in between and all together they probably sat in the oven for 4 hours but pull one out every once in a while and check out the consistency.
To store I took an old jar and printed out a label to glue on, then put some mod-podge over to seal. I finished by spray painting the lid.
-Jerica-
Thursday, February 14, 2013
Saturday, February 9, 2013
SNOOZE BREAKFAST POT PIE

If you're reading this and you're from Colorado probably know about the restaurant Snooze. If you know about Snooze you also know it usually has an hour and a half wait. The first time we went I think we waited an hour and a half! There are several locations here, and only one other in San Diego. Every location does so well, I know it will take over the world soon. Look out Wal-Mart (allrightsreserved?!)! All of the dishes are so high quality but no more expensive than any other breakfast place. Another of my favorites to order is the sweet potato pancake with ginger butter!
Anyway this recipe is one of their most popular dishes, and what I order everytimeee. It is eggs over puff pastry and an amazing sausage rosemary gravy poured on top. It sounds weird, I know. I don't think I would order it from the description but I tried a bite of my friends and was hooked! Just give it a chaaaance! This recipe is dead on and tastes exactly like the restaurant, so if you don't live nearby you can do it yourself!
This recipe was slightly altered and actually released by one of Snooze's employees on a local news station. I chose to make individual servings so it was more like the restaurant but this was intended to make as a casserole to serve several people. I also could not find puff pastry so I grabbed some flaky biscuits! Also if you are vegetarian, you could try substituting the sausage with mushrooms.
Snooze Breakfast Pot Pie
INGREDIENTS:
1 sheet puff pastry (approximately 8x10 inch)
12 eggs scrambled
4 cups sausage gravy (see recipe below)
Egg wash (whisk one egg with 1 Tbs. water)
1 sheet puff pastry (approximately 8x10 inch)
12 eggs scrambled
4 cups sausage gravy (see recipe below)
Egg wash (whisk one egg with 1 Tbs. water)
ROSEMARY-SAUSAGE GRAVY:
2 cloves minced garlic
2 leeks, cleaned and chopped (discarding leaves)
2 celery stalks (chopped)
2 cloves minced garlic
2 leeks, cleaned and chopped (discarding leaves)
2 celery stalks (chopped)
2 large carrots (sliced)
1 sprig of rosemary (finely chopped)
1 lb. bulk breakfast sausage (browned and drained)
3 Tbs. unsalted butter
1 sprig of rosemary (finely chopped)
1 lb. bulk breakfast sausage (browned and drained)
3 Tbs. unsalted butter
4 cups milk
½ cup Parmesan cheese (grated)
½ cup all purpose flour
Salt and pepper to taste
½ cup Parmesan cheese (grated)
½ cup all purpose flour
Salt and pepper to taste
DIRECTIONS
1. Melt butter in a large pot over medium heat. Add leeks, carrots, celery, garlic, and rosemary and sauté until vegetables soften (about 10 min). Preheat oven to 400F
2. Stir in flour and continue to cook until the flour is well incorporated. At this point, stir in the cooked sausage, milk and Parmesan cheese. Bring to a boil and then reduce heat and allow to simmer (stirring occasionally) until the gravy thickens (about 10-15 min). Season with salt and pepper to taste.
3. Pour thickened gravy into a medium sized casserole dish. Top with
scrambled eggs. Cover the casserole dish with the puff pastry dough,
crimping the dough around the edge of the dish.
4. Lightly brush the pastry dough with egg wash. Place in preheated oven and bake for approximately 30 minutes or until the pastry is golden brown.
4. Lightly brush the pastry dough with egg wash. Place in preheated oven and bake for approximately 30 minutes or until the pastry is golden brown.
Serves 6 to 8
-Jerica-
Monday, February 4, 2013
BAKED KALE CHIPS
.jpg)
I have found my new obsession. Baked Kale Chips. That is all.
Oh and here is the recipe! It is so simple!
Ingredients:
Kale
Sea Salt
Black Pepper
Olive Oil
1. Chop kale in large pieces and without stem and make sure it is dry!
2. Toss in a little olive oil - do not drench it! just enough to coat it lightly
3. Add some salt and pepper ( be careful to not add too much!)
4. Bake at 350 F for 12-14 minutes
-Amy-
Sunday, January 27, 2013
THRIFT FINDS: PART II

Some more of my favorite finds!
1. Painting with frame $5
2. Steve Madden Heels $2
3. Star Mirror $1
4. Messenger Bag made from recycled billboards $4
-Jerica-
Thursday, January 17, 2013
TREE STUMP END TABLES
This is probably the first DIY that I will not say is super easy and quick! I've been working on these guys since November I believe, slowly picking away at the bark each day with a screw driver and hammer. This was the definitely the longest part, but I've heard if the bark is dry enough it will slide right off. Mine did not!
I got the stumps from my aunt's pile of firewood, but I know other people have gotten them from wood yards for super cheap. Just gotta watch out for termites and spiders! Some people suggest placing the stump in plastic trash bag and then leaving it somewhere like a garage for a few months. This will allow the bark to dry out and will prevent new bugs from getting in and old bugs from spreading around your garage.
I got the stumps from my aunt's pile of firewood, but I know other people have gotten them from wood yards for super cheap. Just gotta watch out for termites and spiders! Some people suggest placing the stump in plastic trash bag and then leaving it somewhere like a garage for a few months. This will allow the bark to dry out and will prevent new bugs from getting in and old bugs from spreading around your garage.
I made these shorter because I will put them next to my bed, which sits about a foot off the ground. (To get a better look the bunting I have up, click here!)

MATERIALS
Tree stump(s)
Flathead screwdriver
Hammer
White paint
Sandpaper
Polyeurthane
DIRECTIONS
1. Use a hammer and flat-head screw driver to pry off the bark. Be careful not to jam the screwdriver into the side of the wood, but just skim the surface. There were a few spots that still had large branches, I broke those off then used the hammer to flatten it out.
2. Sand away! Get as much of the left over bark off as you can.


4. After the paint is dry, make sure all the dust is off. I used a clean paint brush to get the sawdust off.

5. Paint on the polyeurthane. Let this dry a few hours between layers. This will help seal and prevent anything from staining the wood. The brand recommends using three layers, but you can use more if you want a glossier look. HOORAY NEW TABLES!

Thursday, January 10, 2013

Wednesday, January 9, 2013
PAINT BY NUMBERS ART

I saw this upcycle a while back on A Beautiful Mess, of course! I have to say that a lot of my ideas/inspiration for crafts come from that site. When they did it, they bought pre-made adherent letters and spray painted white over it, then peeled them off. Way easier. However I wanted to do a longer phrase (from one of my favorite Animal Collective songs) so I would have had to buy a few packages of letters. So I set out to do it the hard way! I've had this idea in the back of my head, while I kept an eye out for a Paint-By Numbers piece of art at the thrift stores. And finally found this one! It is super faded so I realized the color scheme kind of looks like camouflage.. but I was desperate okayyy!
Materials
Finished paint by numbers artwork
White paint

I printed out the phrase I wanted, "Kissing the wind through my window screen" in the font I wanted and the size I wanted, to make sure it would all fit on the picture. Then I just free-handed it, looking at the font and size for reference. Paint white around the letters and you're done! The font I chose was kind of a hassle because of the little details, but I love how it turned out! Also, choosing a more bulky font will allow you to see more of the original picture behind it!
-Jerica-
Wednesday, January 2, 2013
HOT SPINACH ARTICHOKE DIP

INGREDIENTS
- 1/2 (10 ounce) package frozen or fresh spinach, drained and coarsely chopped
- 1 (14 ounce) can artichoke hearts, drained and coarsely chopped
- 4 ounces cream cheese
- 1/2 cup sour cream
- 1/4 cup mayonnaise
- 1 clove garlic, grated
- 1/2 teaspoon chili sauce (optional)
- 1/4 cup grated parmigiano reggiano (parmesan), grated
- 1/4 cup mozzarella, shredded
DIRECTIONS
- Simply mix everything and pour it into a baking dish. I also put an extra layer of mozzarella on the top before I threw it in the oven.
- Bake at 350F oven until the sides are bubbling and cheese has melted and turned golden brown on top, about 20-30 minutes.
Original recipe found here.
-Jerica-
Subscribe to:
Posts (Atom)